
Caasify Documentation
Here you can find information to work with Caasify, registration, installing module, start your bussiness
Topics
Install WHMCS Module
This document is for those Hosting companies who want to install Caasify Module on their own WHMCS to have access to Caasify Marketplace and sell products provided by DataCenters
STEP A: Download and Extract Module Files
- 1- First, you need to visit our GitHub repository and download the module Zip file of the latest release
- 2- Log in to your cPanel and go to your File Manager, and extract the downloaded module file into the root directory of WHMCS.
- 3- Navigate to the extracted folder (c aasify-whmcs-module folder) and Copy/Move its contents to the root WHMCS directory.
- 4- After copying, check the path whmcs/modules/addons/caasify. If the caasify folder is there, the installation was successful.
STEP B: Enabling the Module
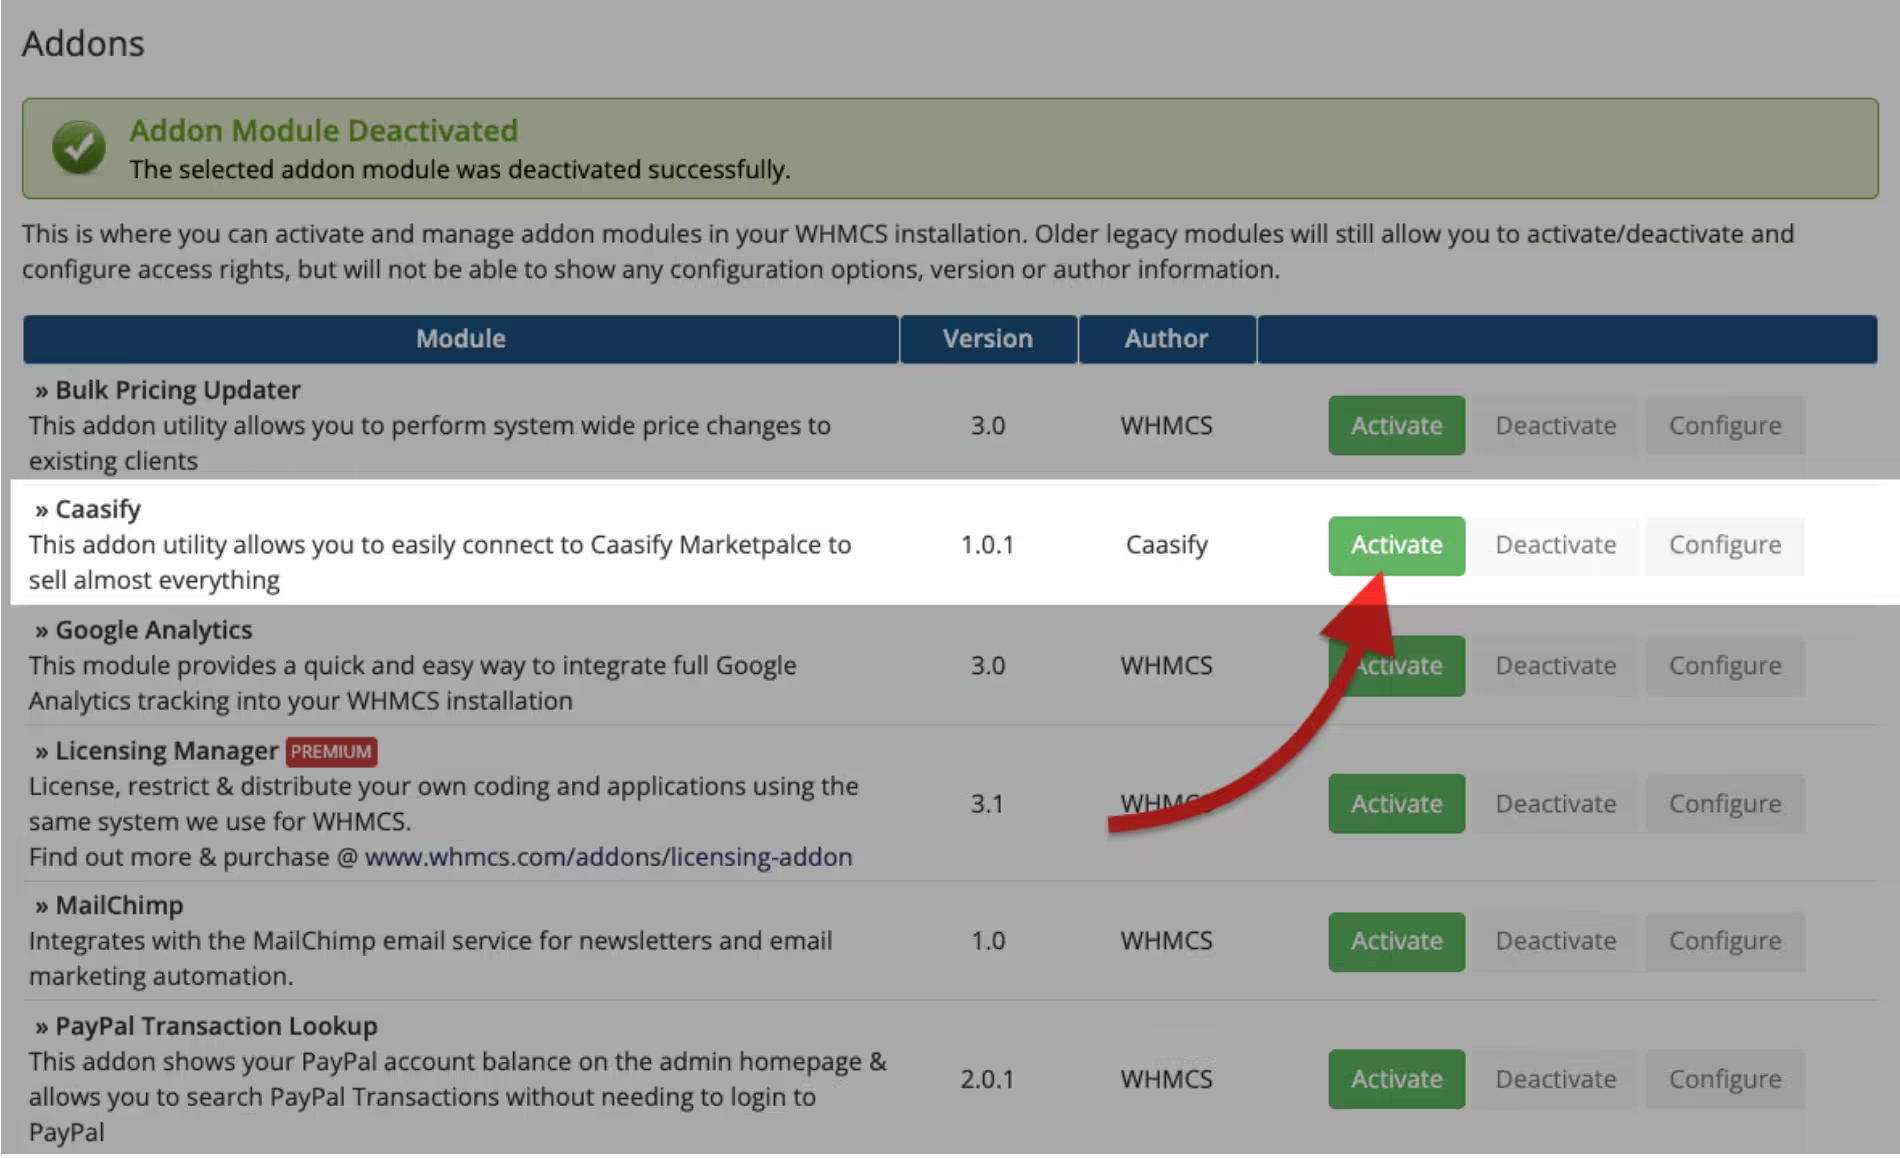
- 1- Log in to the WHMCS admin page and navigate to "System Settings > Addon Modules""
-
2- Find the Caasify module, click on "Activate" like following image
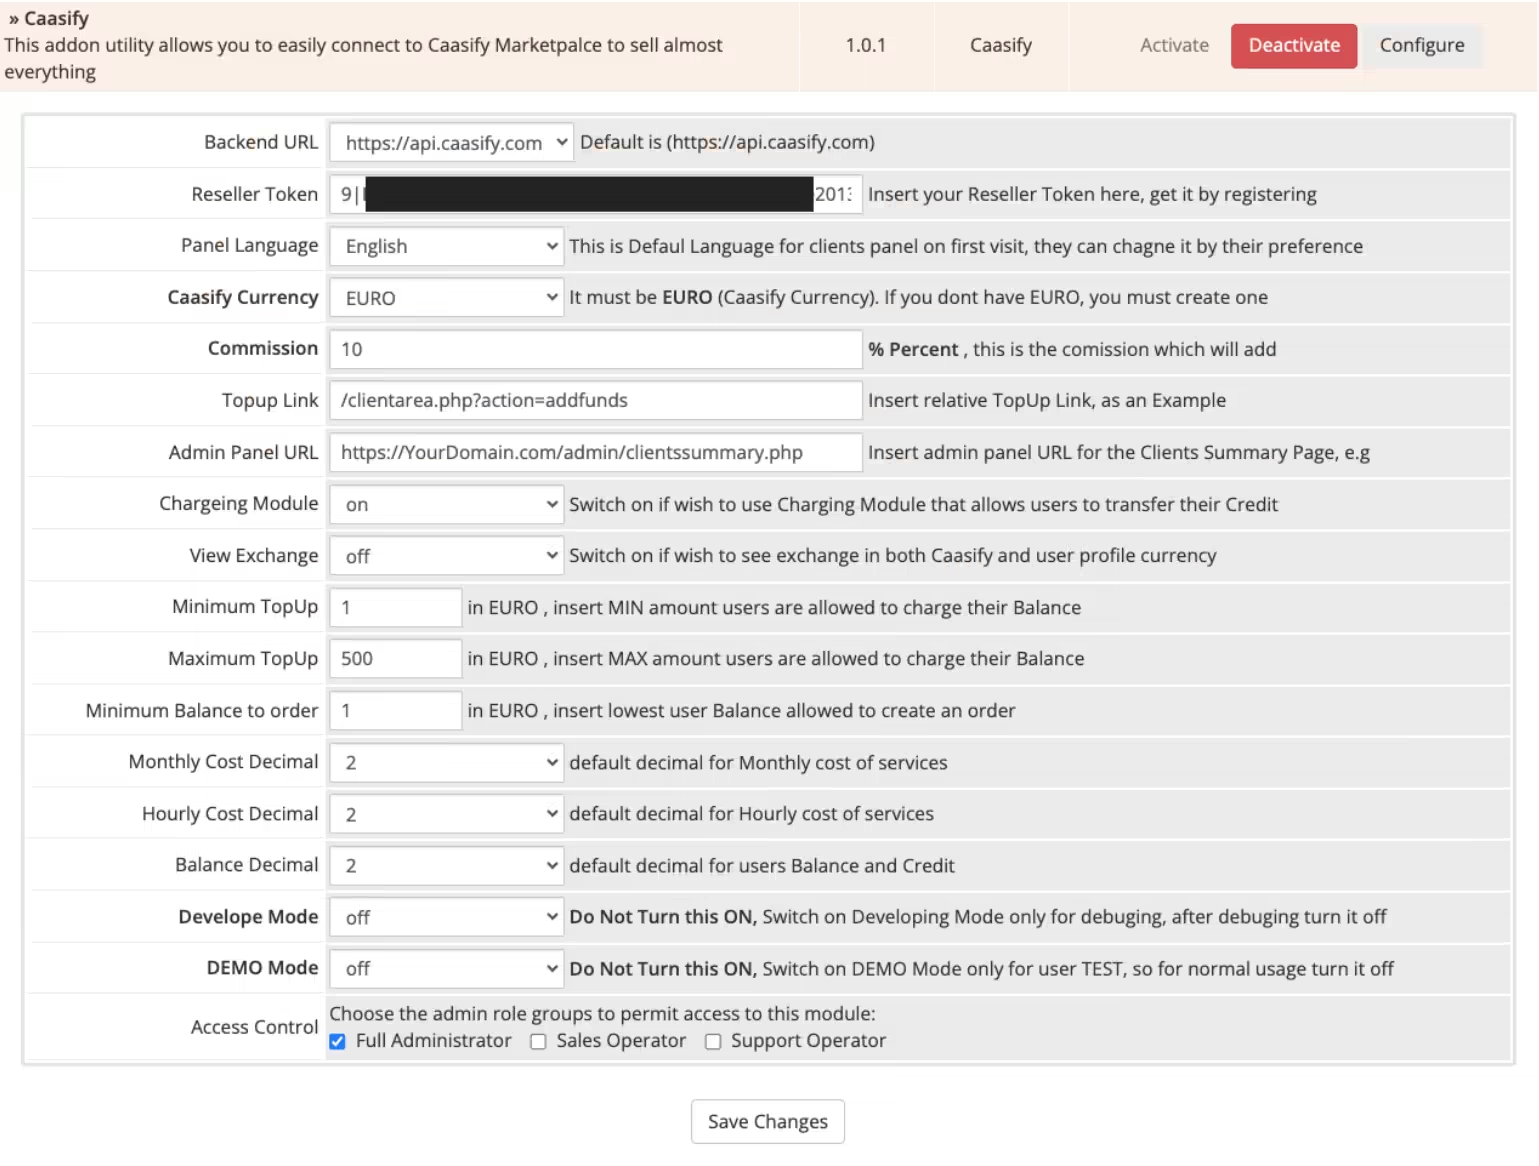
- 3- After Activation, click on "Configure", now you need to configure the module parameters as in the following image. Default values are the best options.
- 4- For Caasify Currency, you must add EURO currency to your WHMCS in (System Settings > Currencies), then select EURO Here as Caasify Currency.
-
5- Commission filed is your desired commission percentage, if you like to have 10%
margin then you should record 10.
-
6- For Reseller Token, you must register in
(
https://my.caasify.com
)
then log in and find
Your Reseller Token on the home page

- 7- We suggest not changing the other fields and then clicking on the Save Changes button. the module is successfully installed.
STEP C: Placing an Order
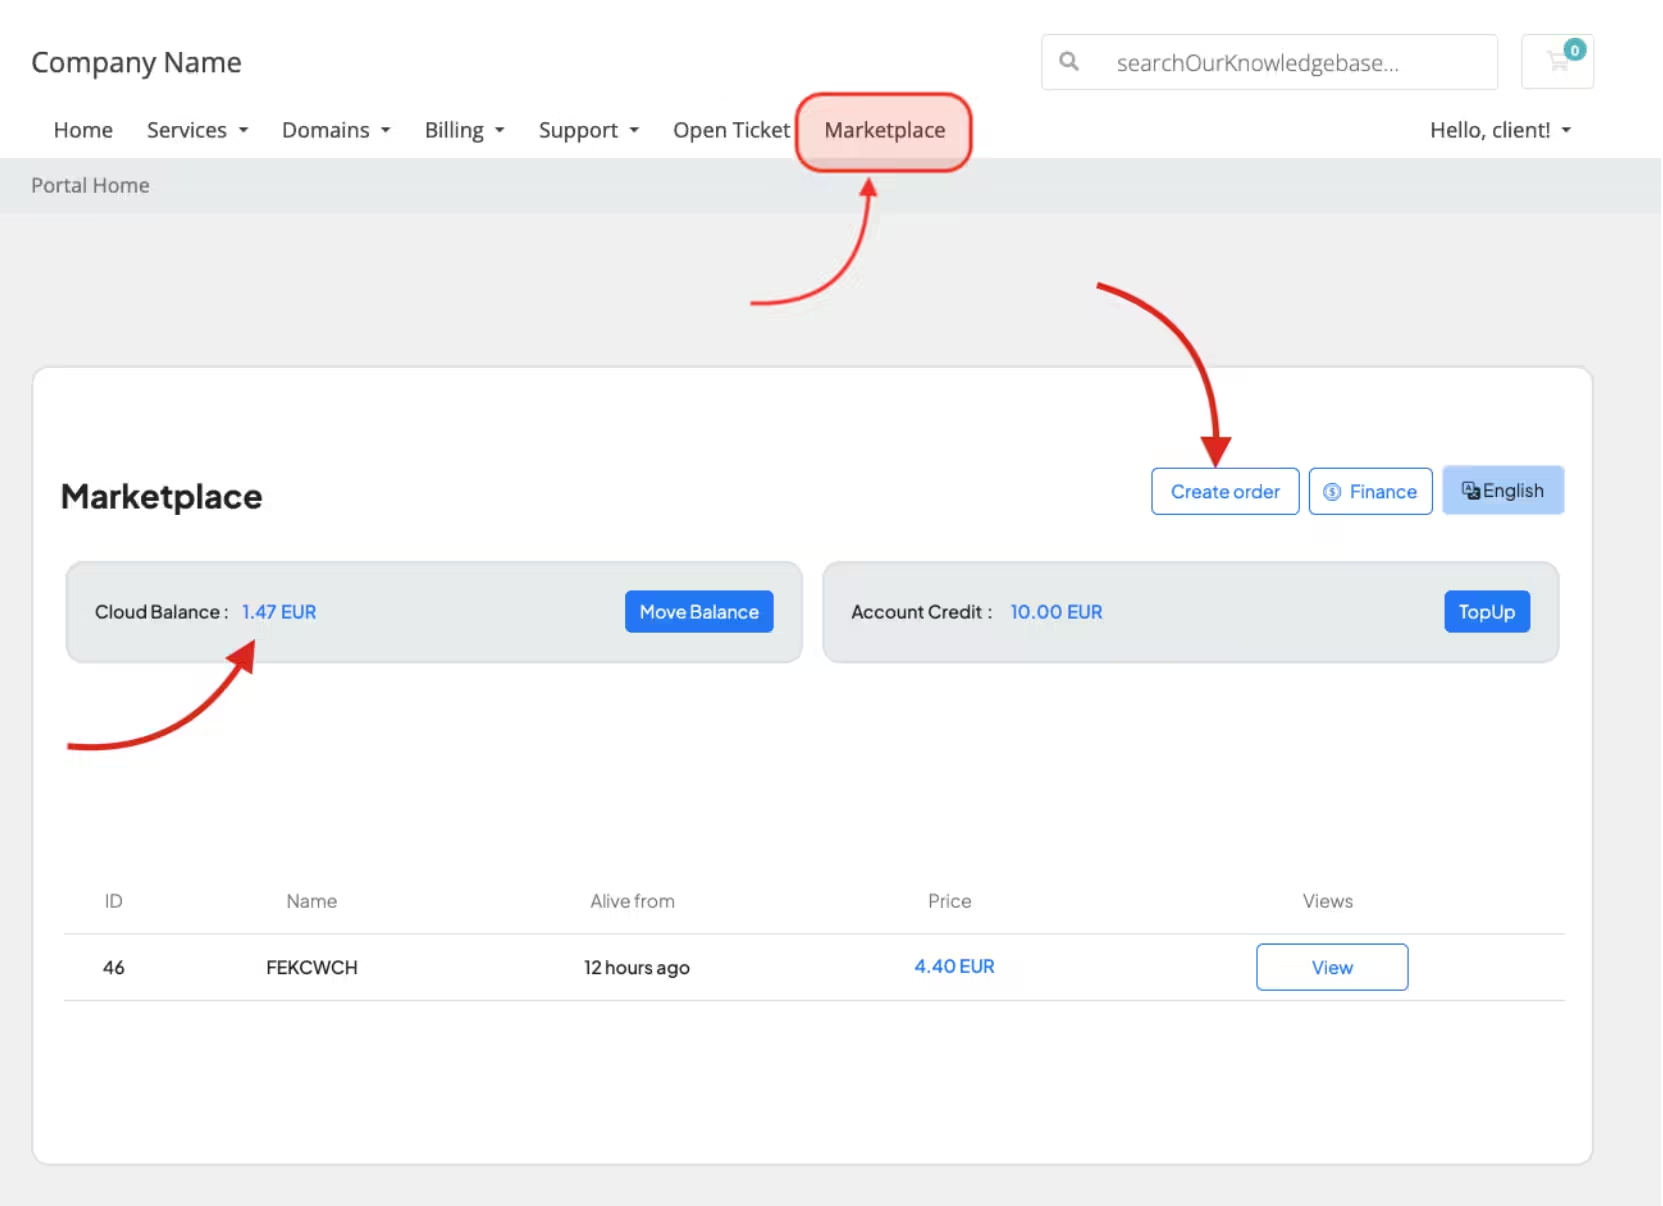
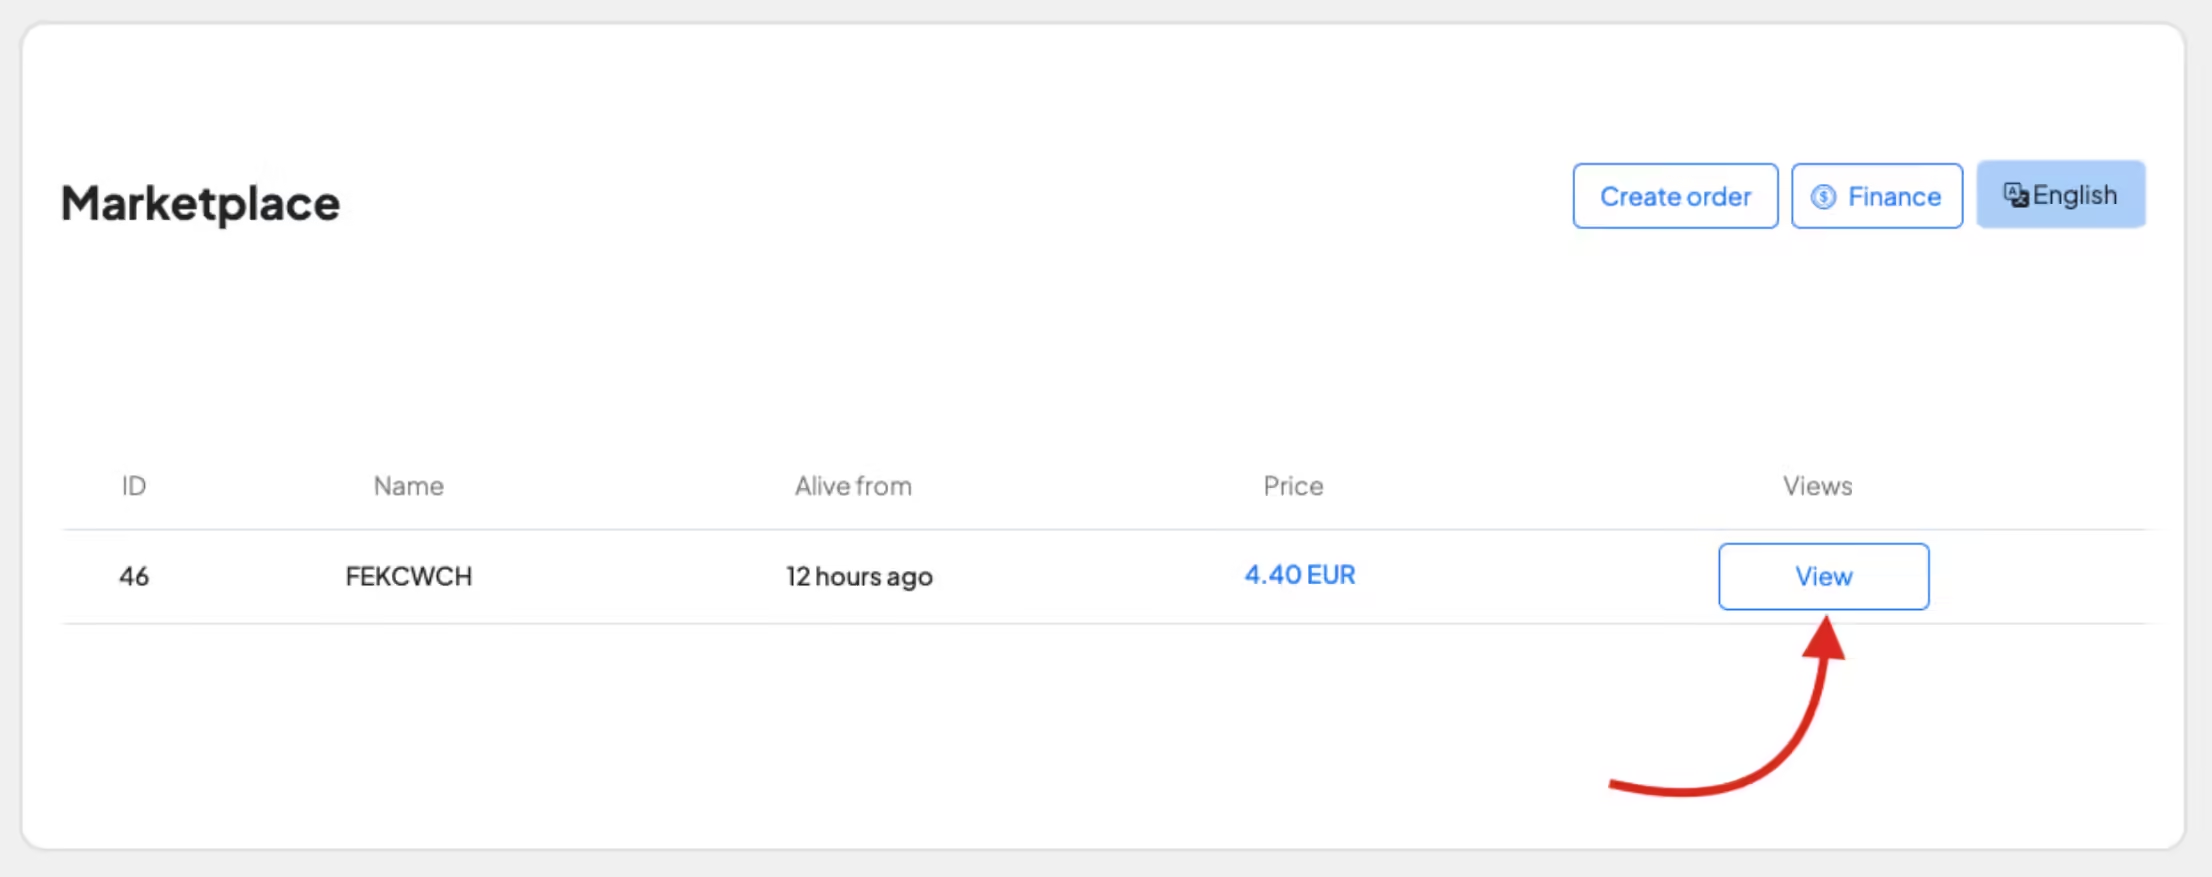
- 1- For testing the module's functionality, you can log in to one of your customer accounts in WHMCS.From now on, you will have a new tab called "Marketplace" in your WHMCS menu.
-
2- Click on the "Marketplace" tab and then click on the "Create Order" option, then you
will be sent to the Create Page.
-
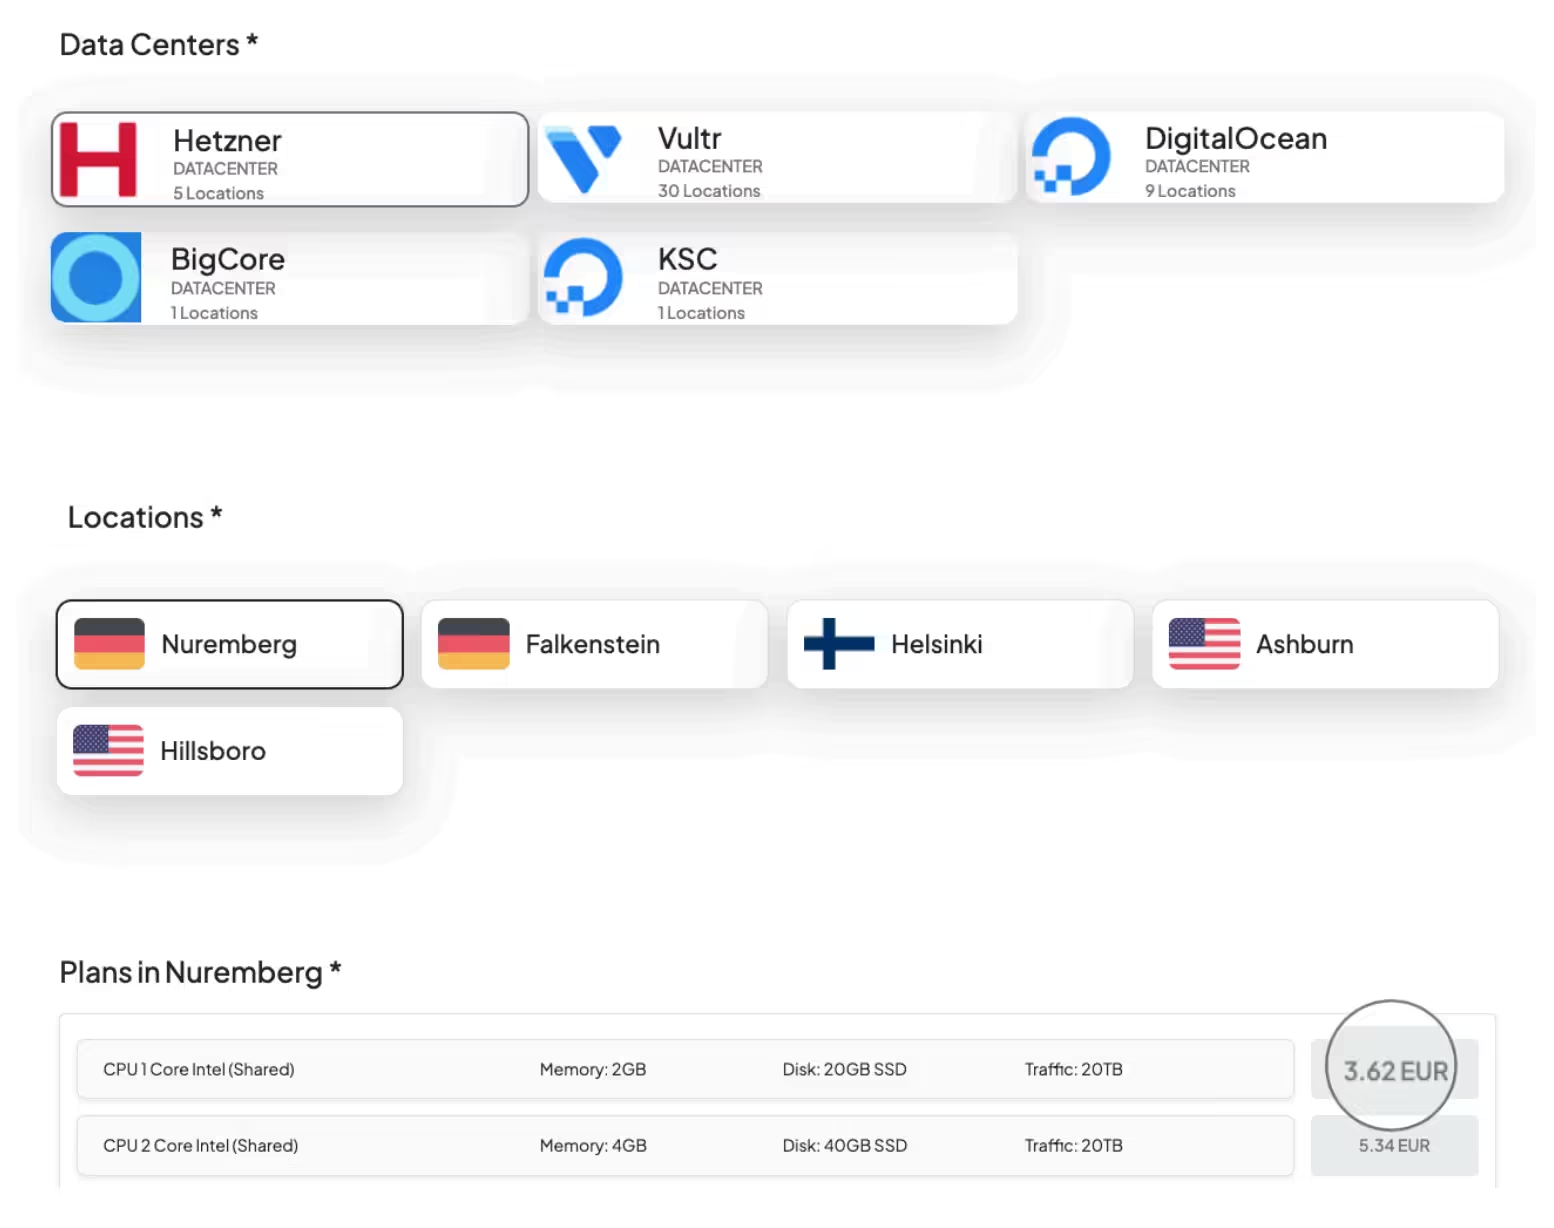
3- In the Create Page, you can view the list of products available in the marketplace.
Follow the instructions and select your preferred config for your order.
Note: you may be unable to create order due to lack of client balance.
- 4- It's worth mentioning that you won't be able to order a product because your token is invalid, and you need to recharge your reseller token on the my.caasify.com website. To recharge temporarily, open a ticket on the my.caasify.com website.
-
5- After receiving the successful response of creating the machine, then go back to the
index page and select the VIEW button of your order to see details and information
about your order.
-
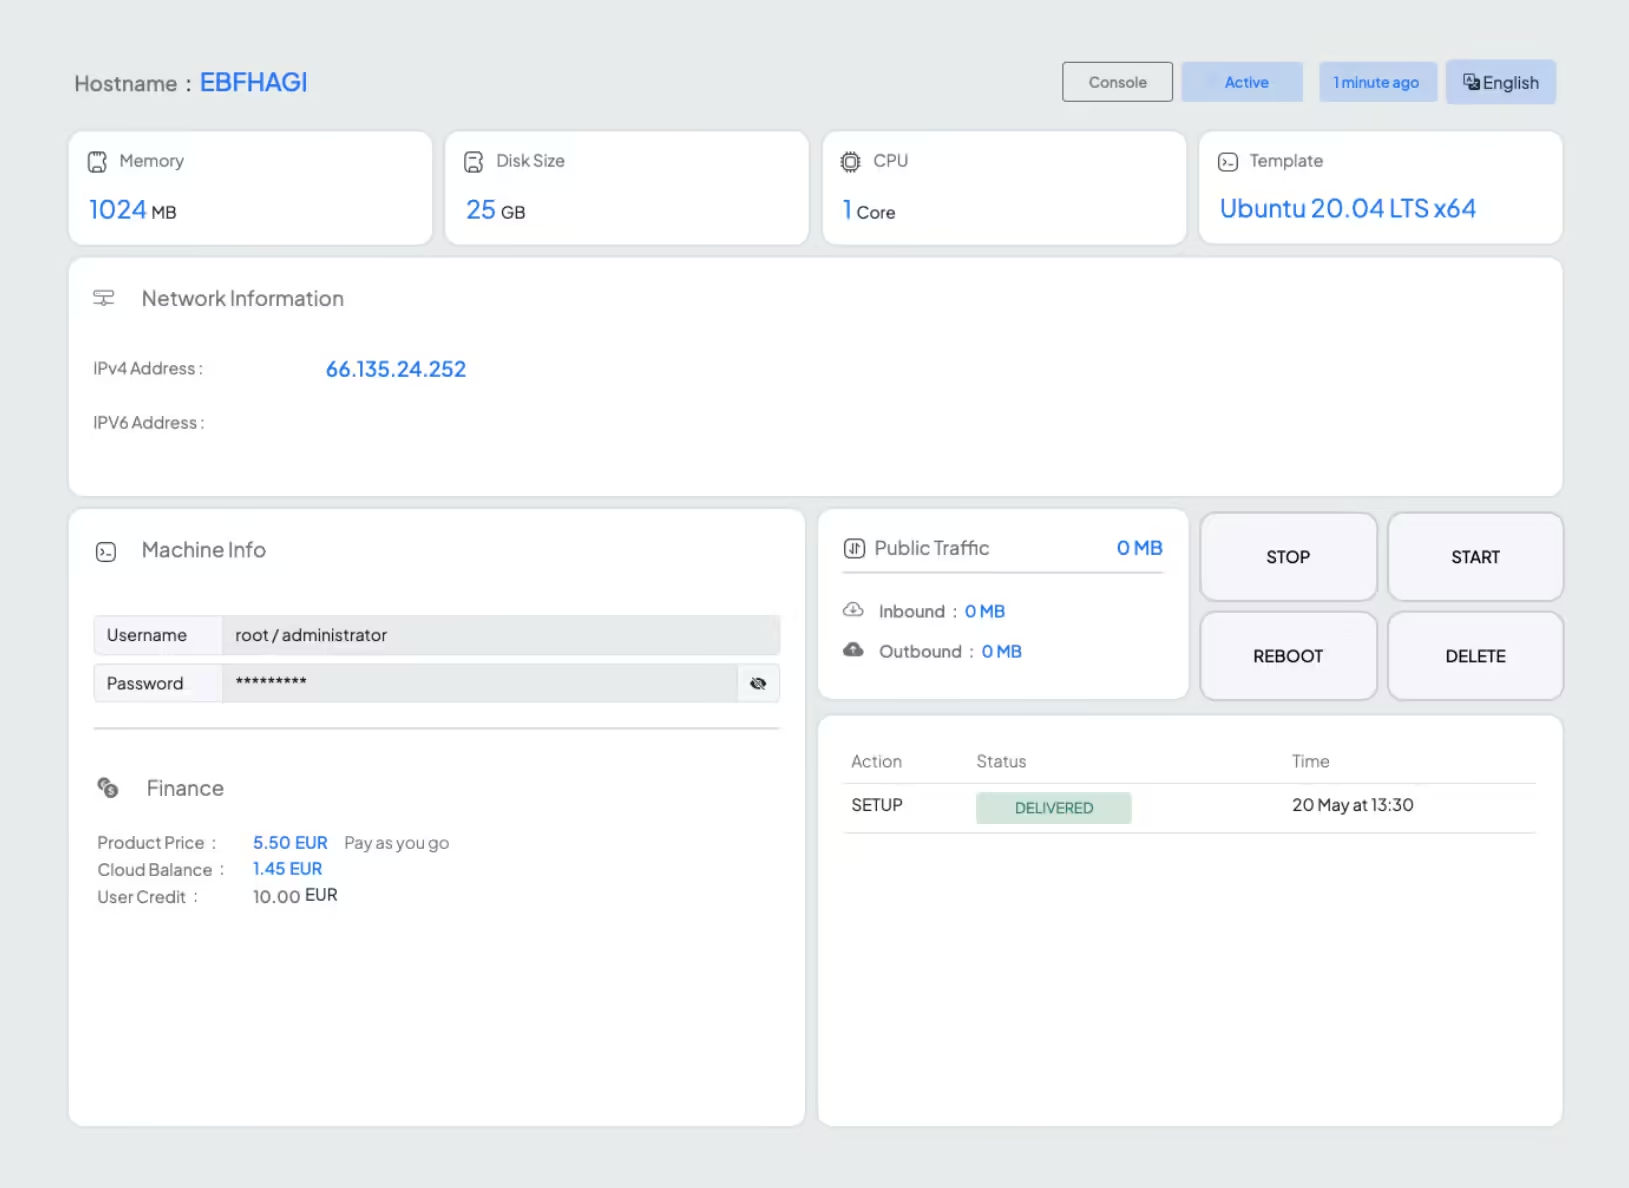
6- In the VIEW Page, you can see the order information like Price, User and Password, IP
address, and traffic. Also, you have access to the Action buttons and Console as well as
the Action History.
Note: In the first few minutes of creating the machine, you must wait at least 5 minutes until the setup of the machine is finished.
STEP D: Adding Funds on WHMCS
-
1- To give access to your users to add funds to their accounts and create services on an hourly basis,
you need to enable the "Add Funds" option in WHMCS.
To activate this option, go to “System Settings > General Settings”, navigate to the "Credit" tab, and enable the option "Check to enable adding of funds by clients from the client area". Additionally, you can temporarily disable the "Require Active Order" option.