
Introduction
Setting up a LEMP stack—Linux, Nginx, MySQL, and PHP—is a powerful way to host dynamic websites and applications on an Ubuntu server. This guide walks you through installing and configuring each component, ensuring your server is optimized for performance and scalability. With Nginx handling web requests, MySQL managing your data, and PHP processing dynamic content, you’ll have the perfect setup for building robust, high-performance sites. We’ll cover step-by-step instructions for installing each tool and connecting them seamlessly, so you can easily get your LEMP stack running on Ubuntu. Let’s dive into creating a stable, efficient server environment for your web projects.
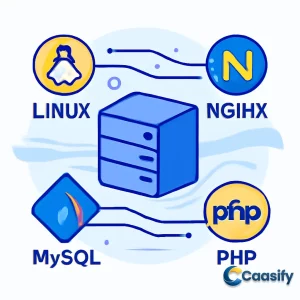
What is LEMP stack?
The LEMP stack is a set of software tools used to run dynamic websites and applications. It includes a Linux operating system, an Nginx web server, a MySQL database for storing data, and PHP for processing the site’s content. This combination provides a powerful and efficient way to host websites, especially those built with PHP, on an Ubuntu server.
Step 1
Alright, let’s get started! If you want your site to actually show web pages to visitors, you need a good web server. This is where Nginx comes in – it’s a fast, lightweight server designed to handle a lot of traffic while keeping things running smoothly. It’s like the reliable engine of the internet, able to manage hundreds, or even thousands, of connections at the same time.To begin, you’ll use APT, the package manager that makes installing software on your Ubuntu server simple. But before jumping into the installation, it’s always a good idea to update your server’s package list first. This makes sure you’re installing the latest versions of everything. To do this, just run:
sudo apt updatesudo apt install nginxsudo ufw app listAvailable applications:
Nginx Full
Nginx HTTP
Nginx HTTPS
OpenSSHsudo ufw allow ‘Nginx HTTP’sudo ufw statusStatus: active
To Action From
— —— —-
OpenSSH ALLOW Anywhere
Nginx HTTP ALLOW Anywhere
OpenSSH (v6) ALLOW Anywhere (v6)
Nginx HTTP (v6) ALLOW Anywhere (v6)ip addr showhostname -Icurl -4 icanhazip.comhttp://server_domain_or_IP If everything’s set up right, you should see Nginx’s default landing page, which confirms the web server is up and running smoothly. If you see that page, congratulations! You’ve successfully installed Nginx and set it up to accept HTTP traffic. Your server is now ready to serve web pages. Install Nginx on Ubuntu
Step 2
Now that your Nginx web server is all set up, it’s time to add the next key component: a database system. That’s where MySQL comes in. If you’ve worked with web apps before, you probably know that databases are the core of most dynamic websites. MySQL is a great, reliable option, especially when used with PHP, as they work together smoothly to power dynamic sites. Here’s how to get started with MySQL: First, like you did with Nginx, use the APT package manager to install MySQL on your server. No need for anything complicated—just run this simple command:
sudo apt install mysql-serversudo mysql_secure_installation0 = LOW : Passwords need to be at least 8 characters.
1 = MEDIUM : Passwords need to be at least 8 characters and include a mix of numbers, uppercase and lowercase letters, and special characters.
2 = STRONG : Passwords need to meet the same requirements as medium, but also undergo a dictionary check.For most people, the medium level (option 1) is a good balance between security and ease of use. After selecting the level, you’ll be prompted to set and confirm a password for the MySQL root user. Keep in mind that the MySQL root user isn’t the same as the system root user. The MySQL root user has full control over the MySQL server, so make sure you pick a strong password. Once you enter your password, you’ll see how strong it is. If you’re happy with it, press Y to move forward.Next, the script will clean things up by removing anonymous users, disabling remote root logins, and deleting the test database. For each prompt, press Y to confirm and improve the security of your MySQL setup. Once that’s done, it’s time to check that everything’s working as it should. Try logging into the MySQL console as the root user:
sudo mysqlWelcome to the MySQL monitor.Commands end with ; or \g.Your MySQL connection id is 10Server version: 8.0.28-0ubuntu4 (Ubuntu)mysql>exitStep 3
Alright, now that Nginx is serving your website’s content and MySQL is managing your data, the next step is installing PHP. This is where things start to get interesting—PHP is what powers all those interactive, dynamic websites. It lets web pages interact with databases, process forms, and handle server-side tasks that keep the internet running.If you’ve worked with servers like Apache before, you might be used to PHP requests being handled automatically. But with Nginx, it’s a bit different. Nginx doesn’t have a built-in PHP processor, so it needs a little help. That’s where PHP-FPM (FastCGI Process Manager) comes in. With this setup, Nginx sends PHP requests to PHP-FPM, which processes them and sends the results back to Nginx to serve to your visitors. The benefit of this approach? It gives you better performance and scalability, especially for PHP sites that handle a lot of traffic.But here’s the thing: it does need a bit of extra configuration. The first step is to install php8.1-fpm, which is the PHP FastCGI Process Manager that lets Nginx communicate with the PHP interpreter. Depending on your operating system, the version might change over time, but for now, php8.1-fpm is the most stable version. Along with php8.1-fpm, you’ll also need the php-mysql package. This is a PHP module that lets PHP talk to the MySQL database you set up earlier. You can think of php-mysql as the bridge between PHP and MySQL, making sure they work together smoothly.Don’t stress too much about the technical side of things. Installing php8.1-fpm will automatically pull in all the other PHP components as dependencies. So, you only need to install the two packages—php8.1-fpm and php-mysql.To install them, just run:
sudo apt install php8.1-fpm php-mysqlStep 4
Alright, now that Nginx is handling your content and MySQL is managing all that precious data, the next big step in our journey is getting things set up for multiple domains or websites on your server. You might wonder, “How do I manage several websites on a single server?” Well, Nginx has a great feature called server blocks (think of them like Apache’s virtual hosts, but with a bit more style). These blocks let you organize and manage multiple sites without any hassle.Let’s say your website’s name is your_domain—but don’t get too attached to it, because you’ll want to swap that out with your actual domain name when you do this for real. In Ubuntu, Nginx starts off with one default server block, which points to /var/www/html. This works fine for a single website, but once you add a second website, that directory gets a bit crowded, right? No worries, though—we’ll keep /var/www/html as it is and create a fresh new folder just for your_domain. This keeps everything clean and tidy!Here’s how to do it:First, let’s create the root web directory for your site. Just run:
sudo mkdir /var/www/your_domainsudo chown -R $USER:$USER /var/www/your_domainsudo nano /etc/nginx/sites-available/your_domain
server {
    listen 80;
    server_name your_domain www.your_domain;
    root /var/www/your_domain;
    index index.html index.htm index.php;    location / {
        try_files $uri $uri/ =404;
    }    location ~ \.php$ {
        include snippets/fastcgi-php.conf;
        fastcgi_pass unix:/var/run/php/php8.1-fpm.sock;
    }    location ~ /\.ht {
        deny all;
    }
}
- listen : We’re telling Nginx to listen on port 80, which is the standard for HTTP traffic.
- server_name : Here, you’ll put your actual domain or public IP address instead of your_domain. This tells Nginx which domain or IP to respond to.
- root : This tells Nginx where to find the website files. We’ve set it to /var/www/your_domain so it knows where to look.
- index : This tells Nginx the order of priority for index files. It looks for index.html first, then index.htm, and finally index.php.
- location / : If someone requests a file or folder that exists, this block will serve it. If not, it returns a 404 error.
- location ~ .php$ : Here’s where we tell Nginx to pass any PHP requests to PHP-FPM (FastCGI Process Manager), so it can process those requests.
- location ~ /.ht : This block is a security measure—Nginx won’t process or serve any .htaccess files, which could otherwise expose sensitive info.
Once you’ve inserted the configuration, save and exit nano. To do that, press CTRL+X, then press Y to confirm the changes, and hit ENTER.Now, let’s activate the configuration. We’ll create a symbolic link from sites-available to sites-enabled, where Nginx looks for active configurations:
sudo ln -s /etc/nginx/sites-available/your_domain /etc/nginx/sites-enabled/sudo unlink /etc/nginx/sites-enabled/defaultsudo ln -s /etc/nginx/sites-available/default /etc/nginx/sites-enabled/sudo nginx -tsudo systemctl reload nginxnano /var/www/your_domain/index.html
<html>
  <head>
    <title>your_domain website</title>
  </head>
  <body></p>
<h1>Hello World!</h1>
<p>This is the landing page of <strong>your_domain</strong>.</p>
<p>  </body>
</html>
http://server_domain_or_IP If everything went smoothly, you should see your “Hello World!” page. This means your Nginx server block is working as expected. You can leave this as a placeholder for now until you set up a PHP-based index page later on.Just remember, once you switch to PHP content, Nginx will prioritize index.html over index.php, so you’ll need to remove or rename index.html once you’re ready for dynamic content.And there you go! You’ve successfully set up your Nginx server to handle multiple domains, and in the next step, we’ll dive into configuring PHP to make your site truly dynamic.Installing Nginx on Ubuntu
Step 5
Alright, we’re almost there! Your LEMP stack should now be set up and running. But before you get too excited and think everything’s perfect, let’s do a quick check to make sure Nginx is handling PHP files properly. Trust me, this step is important to ensure your server is working just like you want it to.Now, here’s what we’ll do: we’re going to create a simple test PHP file. This file will give you all the info about your server’s PHP setup. Think of it like a quick diagnostic tool to confirm everything is running smoothly.Start by creating a new file called
nano /var/www/your_domain/info.php
<?php
phpinfo();
sudo rm /var/www/your_domain/info.phpStep 6
Alright, you’ve made it this far, and your LEMP stack is up and running! Now, let’s make sure everything is working smoothly, especially the connection between PHP and MySQL. To do that, we’ll set up a test database, add some dummy data, and query it using PHP. This step will confirm that PHP and MySQL are working well together on your server.But before we dive into testing, you’ll need to set up a database. Here’s the deal—you’ll need to create a MySQL user with the right privileges. Don’t worry, it’s super easy once you get the hang of it!Start by logging into the MySQL console as the root user. Open your terminal and type:
sudo mysqlCREATE DATABASE example_database;CREATE USER ‘example_user’@’%’ IDENTIFIED WITH mysql_native_password BY ‘password’;GRANT ALL ON example_database.* TO ‘example_user’@’%’;exitmysql -u example_user -pSHOW DATABASES;
+——————–+
| Database           |
+——————–+
| example_database   |
| information_schema |
+——————–+
CREATE TABLE example_database.todo_list (
  item_id INT AUTO_INCREMENT,
  content VARCHAR(255),
  PRIMARY KEY(item_id)
);INSERT INTO example_database.todo_list (content) VALUES (“My first important item”);SELECT * FROM example_database.todo_list;
+———+————————–+
| item_id | content                  |
+———+————————–+
|       1 | My first important item  |
|       2 | My second important item |
|       3 | My third important item  |
|       4 | And this one more thing  |
+———+————————–+
exitnano /var/www/your_domain/todo_list.php
<?php
$user = "example_user";
$password = "password";
$database = "example_database";
$table = "todo_list";try {
  $db = new PDO("mysql:host=localhost;dbname=$database", $user, $password);
  echo "

<h2 id="todo">TODO</h2>
<ol>“;
  foreach($db->query(“SELECT content FROM $table”) as $row) {
    echo “</p>
<li>” . $row[‘content’] . “</li>
<p>“;
  }
  echo “</ol>
<p>“;
} catch (PDOException $e) {
  print “Error!: ” . $e->getMessage() . ““;
  die();
}
My first important item
My second important item
My third important item
And this one more thing
Conclusion
In conclusion, setting up a LEMP stack with Linux, Nginx, MySQL, and PHP on Ubuntu provides a powerful and efficient foundation for hosting dynamic websites and applications. By following this guide, you’ve learned how to install and configure each component, ensuring seamless integration for optimal performance. From setting up Nginx to processing PHP requests and managing MySQL databases, each step is crucial for creating a stable server environment.As the demand for dynamic, high-performance web applications grows, mastering LEMP stack installation will be a valuable skill for developers. In the future, staying updated with new PHP and Nginx features, as well as security patches, will be key to maintaining a secure and efficient server setup. With this solid foundation, you’re ready to take your web hosting capabilities to the next level.Now that you’ve successfully completed the LEMP stack setup on Ubuntu, you’re well on your way to building robust, scalable websites and applications.
